
How to Change Hinges on Kitchen Cabinets: A Step-by-Step Practical Guide
- By:
- Date:2026/11/04
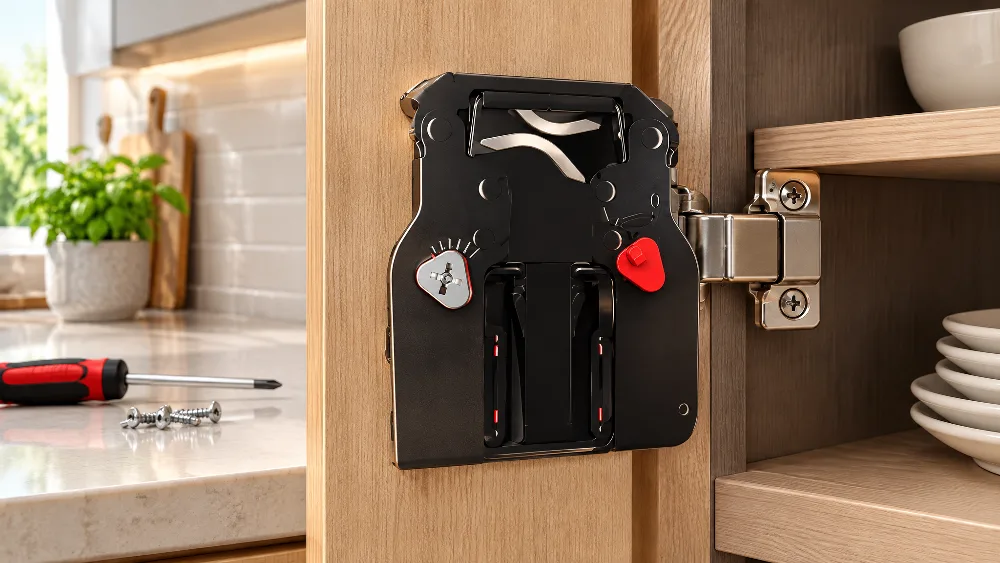
Learning how to change hinges on kitchen cabinets can restore quiet operation to an unruly cooking space. Cabinet doors undergo repeated opening and closing over years of use, gradually loosening hardware and changing door alignment. When the cabinet, door, and replacement hardware are compatible, learning how to change hinges on kitchen cabinets can correct many alignment problems and reduce slamming. Over decades of domestic wear, kitchen hinges degrade through mechanical fatigue and micro-vibrations, while wood fibers surrounding fastening screws slowly crush under constant leverage. Addressing this degradation requires the right replacement kitchen cabinet hinges, systematic preparation, and a practical understanding of cabinet joinery.
Recognizing Structural Fatigue in Cabinet Door Hardware
Cabinet hardware does not fail overnight; it deteriorates through subtle mechanical shifts. A slight sag of two millimeters might seem trivial until door profiles scrape adjacent face frames. Ignoring early wear often results in stripped screw threads, damaged veneer, and strained face frames.
Observable Indicators of Mechanical Wear
Heavy kitchen daily routines place severe shear stress on small steel hinge arms. The earliest sign of internal failure is vertical door drift, where matching double doors no longer share a parallel center line. This can occur when hinge joints wear or when the cup screws loosen in the door’s hinge-cup mounting holes.
Damper wear is another possible sign on soft-close hardware. On models that use a fluid damper, visible leakage or a sudden return of slamming can indicate a failed damping component. Check the hinge instructions before diagnosing the mechanism. Residue near a hinge can also come from cleaning products or cooking grease, so confirm the source before replacing parts.
- Uneven cabinet reveals: Gaps between adjacent cabinet doors shift out of parallel alignment due to loose mounting plate screws.
- Acoustic feedback: High-pitched metallic squeaking or clicking signals compromised internal spring coils or dried internal grease.
- Resistance during opening: Binding hinges pull against face frames, indicating bent pivot links or excessive lateral misalignment.
- Visible frame damage: Dark rub marks along lower stiles reveal that hinge knuckles have lost structural tension.
Upgrading from Traditional to Soft-Close Systems
Older kitchen cabinetry frequently relies on exposed semi-concealed hinges or standard self-closing sprung hinges. These legacy mechanisms pull doors shut under spring tension without slowing them, so the door strikes the cabinet with an audible bang. If the door and cabinet are compatible, replacing the hinges with soft-close models can reduce slamming. Modern concealed soft-close hinges use an integrated damping mechanism to slow the door during closing; the mechanism and adjustment method vary by model. This damping can reduce the impact associated with slamming and may reduce repeated shock loads on the door and cabinet.
Pre-Replacement Assessment: Matching Cabinet Geometry and Hardware
Before picking up tools, you must identify your specific kitchen architecture. Cabinet construction directly dictates which replacement hinges will mount securely. Installing the wrong hinge style risks irreversible damage to cabinet stiles or prevents doors from closing flush.
Cabinet Construction Types: Face-Frame vs. Frameless
American cabinetry predominantly features face-frame construction, where a solid hardwood frame surrounds the front perimeter of the plywood box. Hinges mount directly to the inner edge or face of this hardwood perimeter, which calls for compact or frame-specific mounting plates. In contrast, European-style frameless cabinets omit the front perimeter frame altogether. Hinge mounting plates fasten directly to the interior vertical side panel of the cabinet box. Identifying which construction you have determines the mounting base profile required for your project.
| Cabinet Construction | Primary Hinge Mounting Location | Common Hinge Style | Typical Installation Considerations |
|---|---|---|---|
| Face-Frame | Inner hardwood face frame edge | Compact concealed or face-mount plates | Narrow mounting clearance; requires exact frame thickness matching |
| Frameless (Euro-Style) | Interior cabinet side panel (carcass) | Full-arm European clip-on hinge plates | Mounting-hole pattern varies by plate and cabinet system; confirm the hinge manufacturer’s template |
Door Overlay Dynamics: Full Overlay, Half Overlay, and Inset
Overlay defines how far the cabinet door extends past the cabinet opening over the carcass edge. Full overlay covers most of the cabinet frame or side wall, leaving minimal reveals between doors. Partial or half overlay doors leave part of the cabinet frame or divider partition exposed. Meanwhile, inset doors sit flush inside the cabinet opening rather than resting on top of it. Measure the actual overlay and select the hinge according to the manufacturer’s overlay chart, because overlay also depends on hinge geometry, plate height, and door thickness.
- Does door sit entirely flush inside the cabinet frame opening? Select hinges designed for inset applications according to the door and cabinet dimensions and the hinge manufacturer’s overlay specifications.
- Does door rest outside against the front face of the box and cover almost the entire frame width? Choose Full Overlay Hinges according to the manufacturer’s overlay chart.
- Does door cover only part of the frame width? Choose Partial or Half Overlay Hinges according to the manufacturer’s specifications.
Hardware Checklist and Bore Compatibility
Many concealed hinges use a 35 mm cup, but cup depth and drilling position vary by model. Check the hinge manufacturer’s drilling specifications before drilling. You must also measure the distance from the cup edge to the door perimeter, known as the cup bore distance.
Gather your tools beforehand to avoid mid-project disruptions. You will need a magnetic Phillips screwdriver, a cordless drill with variable torque control, and a 35 mm Forstner bit if retrofitting older non-bored doors. Keep wood dowels, PVA wood glue, and a steel ruler close at hand.
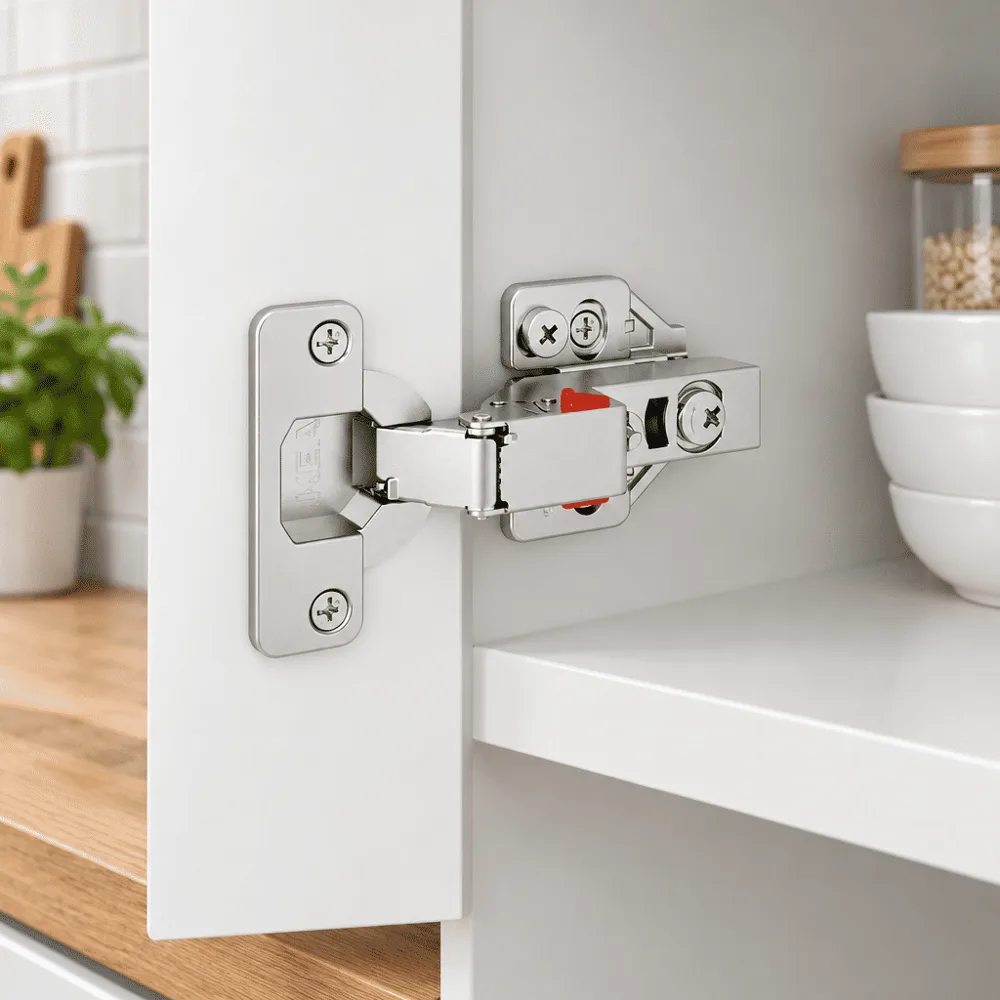
Step-by-Step Guide: How to Change Hinges on Kitchen Cabinets Safely
Executing a smooth hinge replacement requires organized discipline. Removing cabinet doors without careful staging risks scratched finishes, stripped screw holes, and dropped panels. Follow this sequential procedure to keep the work controlled and the results consistent.
Removing Cabinet Doors and Existing Hardware
Begin by clearing all contents from the cabinet shelves to prevent accidental knocking of fragile dishware. Apply painter tape to the back of each door and label its position sequentially from left to right. Cabinet doors settle into their frames over time, making correct replacement positioning essential.
Support the door securely, then loosen or release the hinges in the sequence specified for the hinge type. Keep one hand supporting the door until all attachments are disengaged. If your cabinetry uses quick-release clip hinges, use the release mechanism described in the hinge instructions rather than prying the arm off the plate.
- Secure a stable working platform covered with a soft moving blanket or clean drop cloth.
- Support the door at mid-height, or place wooden blocks under the bottom rail.
- Loosen or release each hinge in the order the hinge instructions specify, keeping the door supported.
- Lift the door clear of the cabinet frame and place it face-down on your soft work surface.
- Unscrew the hinge cup screws from the door back and lift out the old hinge bodies.
Inspecting and Repairing Stripped Screw Holes
Repeated torque from heavy doors frequently strips the delicate wood fibers inside cabinet screw holes, especially in medium-density fiberboard or particleboard cores. Inserting new screws into compromised holes often leads to loose hardware within weeks. Inspect every mounting hole before proceeding with new components.
For a small, localized stripped hole, a glued hardwood plug may work after curing and re-drilling. Coat a hardwood dowel or wooden toothpicks in carpenter glue and press them in without forcing, since excess pressure can split the surrounding surface. Once cured, trim the wood flush with a sharp chisel. If the substrate is badly enlarged, cracked, or made of damaged particleboard or MDF, use a larger engineered repair, a suitable insert, or relocate the fastener according to the hinge manufacturer’s guidance.
- Adhesive saturation: Use aliphatic resin wood glue rather than standard craft glue for a rigid, lasting bond.
- Fiber density: Select hardwood dowels such as birch or maple to match the screw holding power of solid cabinet stiles.
- Flush trimming: Slice protruding dowel ends parallel to the wood grain to prevent tear-out along surrounding veneer.
- Pilot drilling: Drill new pilot holes using a self-centering bit to prevent splitting the newly glued hardwood plugs.
Installing the New Hinges and Mounting Plates
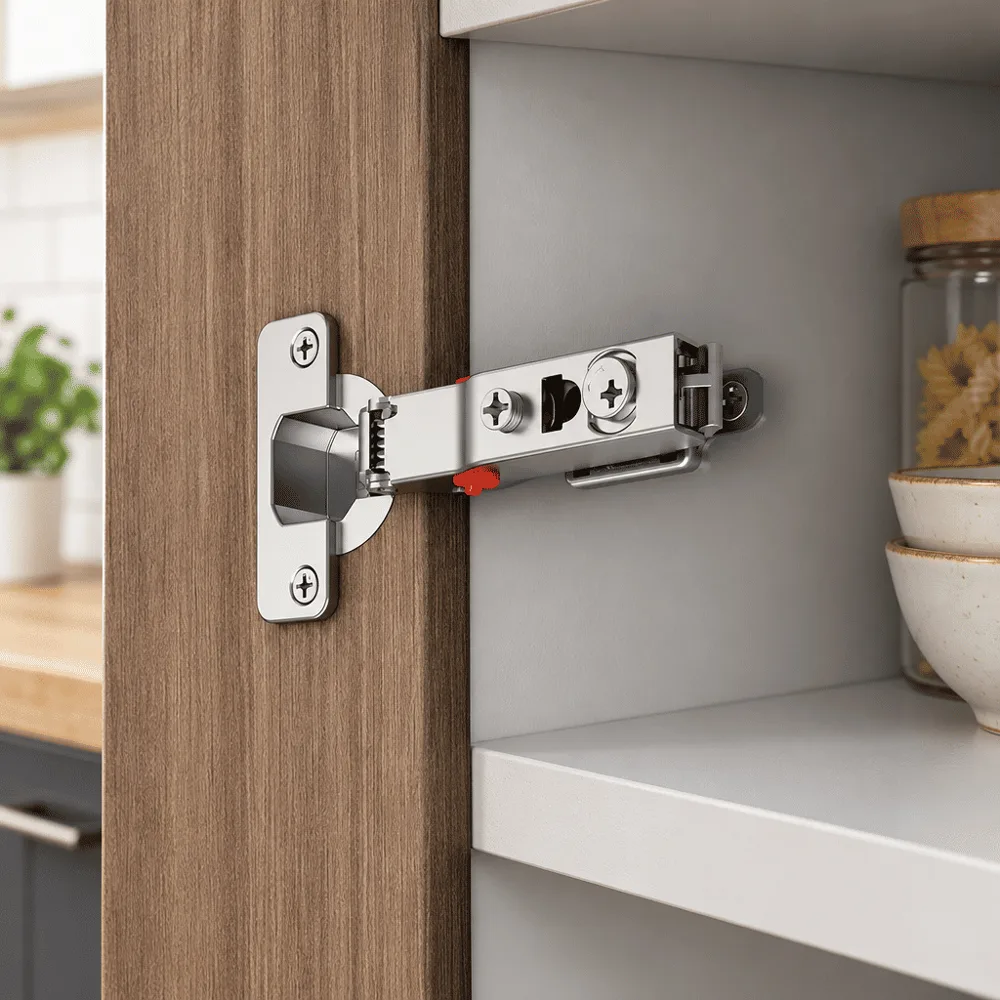
Seat the hinge cup according to the manufacturer’s drilling template, keeping the cup’s front reference edge parallel to the door edge. Use a square or alignment tool where the hinge instructions specify. Uneven cup placement can cause the hinge arm to bind against the mounting plate during travel. Drive the cup fastening screws by hand or with a drill set to low clutch resistance, because overtightening screws into particleboard can fracture the substrate. Next, fasten the mounting plate using the holes or cam system specified for that hinge.
- Seat the cup flat in its bored pocket according to the manufacturer’s drilling template
- Check that the cup’s front reference edge runs parallel to the door edge
- Drive door cup screws firmly without stripping
- Fasten the mounting plate using the holes or cam system specified for that hinge
- Verify all fasteners sit flush with the hardware base
Rehanging the Door onto the Cabinet Box
Hold the door aligned with the cabinet opening and bring the hinge arm over the mounting plate. For clip-on hardware, attach the hinge using the manufacturer’s stated engagement and release procedure, then verify that the hinge is fully locked before letting go of the door. For slide-on hinges, slide the arm onto the plate as the instructions describe and tighten the securing screw lightly. Test the door swing gently to confirm smooth movement before proceeding to final alignment.
Fine-Tuning and Door Alignment: Mastering 3D Adjustments
Once doors are rehung, they rarely align perfectly right away. Minor variations in screw tension, door weight, and frame squareness create uneven gaps. Many modern concealed hinges offer three-way adjustment, which lets you make small alignment corrections without removing the door.
Lateral (Side-to-Side) Adjustment
Lateral adjustment shifts the door left or right across the face of the opening, which sets the gap between adjacent double doors and outer frame margins. Locate the side-to-side adjustment screw identified in the hinge instructions, usually on the hinge arm. Turn it in small increments and observe how the door moves. The direction of adjustment depends on the hinge design, so consult the manufacturer’s instructions to confirm which way moves the door inward or outward. Adjust the top and bottom hinges symmetrically to avoid tilting the door.
Vertical (Height) Adjustment
Vertical adjustment corrects door sagging, aligning horizontal rail lines with adjacent drawers and perimeter cabinets. Some mounting plates use elongated slots, while others include an integrated height-adjustment cam. Use the mounting plate’s height cam if the model has one; otherwise, loosen the plate screws slightly, reposition the door, and retighten them according to the hinge instructions. Move both hinges by equal amounts so one hinge does not carry the door’s weight alone. Check vertical alignment against adjacent cabinet drawers as you go.
Depth (In-and-Out) Adjustment
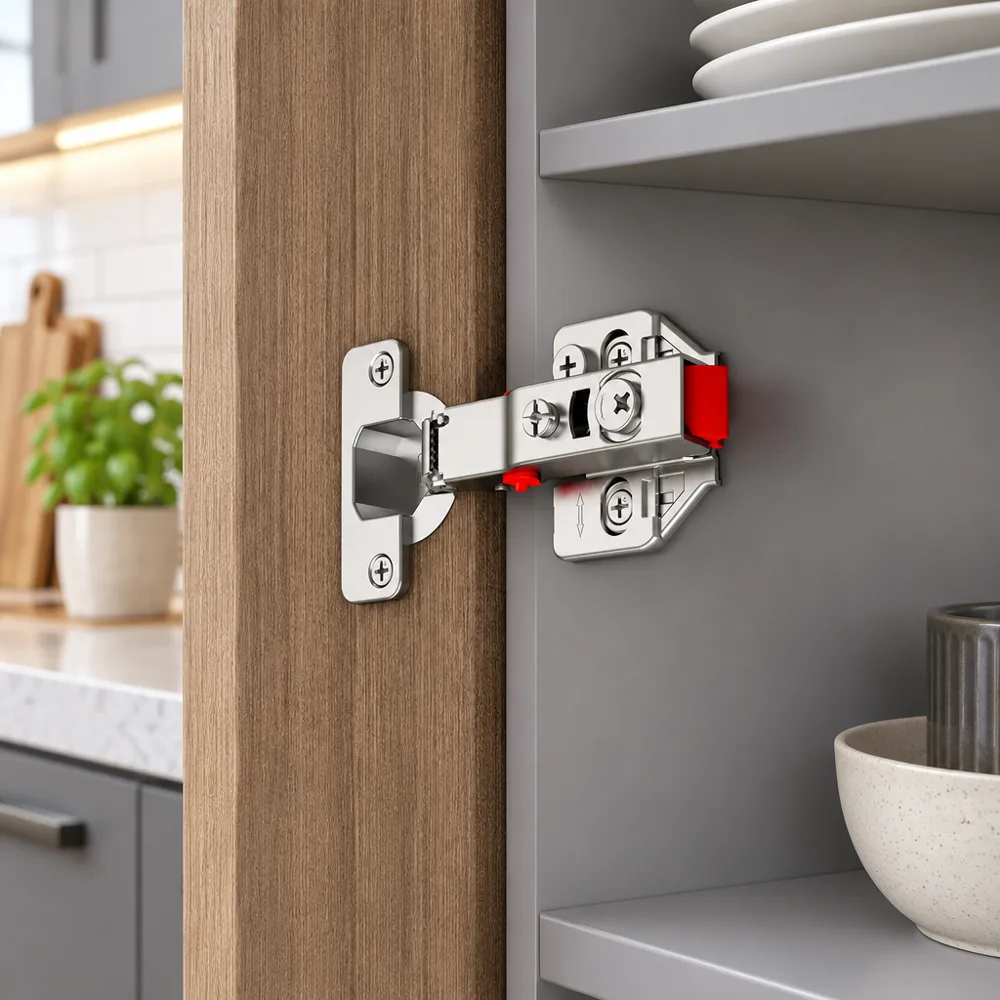
Depth adjustment controls the distance between the rear face of the door and the front face of the cabinet frame. If doors sit too far outward, light leaks through the gap and exposes interior shelf edges. If set too tight, the door edge rubs against the frame corner upon opening. Locate the depth-adjustment screw or cam identified in the manufacturer’s instructions, then adjust it in small increments. Use the hinge manufacturer’s overlay and reveal specifications, and adjust until the gaps are visually consistent and the door opens without rubbing.
- Inspect top reveal: Ensure the clearance between the door top and the upper rail remains parallel across all doors.
- Check middle gap: Adjust lateral screws until the center gap between paired doors looks even from top to bottom and matches the manufacturer’s reveal specifications.
- Verify bottom clearance: Prevent the lower door edge from contacting bottom shelves or integrated under-cabinet lighting valances.
- Confirm damper action: Ensure the door slows and settles smoothly at the end of its swing without bouncing backward.
Engineering Reliability: Selecting Durable Cabinet Hardware
Kitchen environments subject hardware to challenging conditions. High ambient humidity from cooking, airborne grease particles, and frequent chemical cleaning degrade low-grade hardware quickly. Selecting hinges with documented finish and cycle-test specifications can reduce the risk of premature corrosion and wear, provided the hardware is installed and loaded within its intended application.
For us, hinge production began in 1987 in Jinli Town, Gaoyao City, Guangdong, and has developed over more than three decades. Cabinet performance standards such as ANSI/KCMA A161.1 include door-operation and hinge-attachment tests. ISO 9001 addresses quality-management systems; neither standard by itself requires a particular plating or manufacturing process, so finish details still need to be checked model by model.
The supplied product specifications describe copper-plated and nickel-plated finishes and report 48-hour salt-spray resistance for specified models. Before buying, confirm the exact finish, substrate, test method, and model coverage with the manufacturer. Ask about service limitations as well, especially for humid kitchens or cabinets that are cleaned frequently with chemical products.
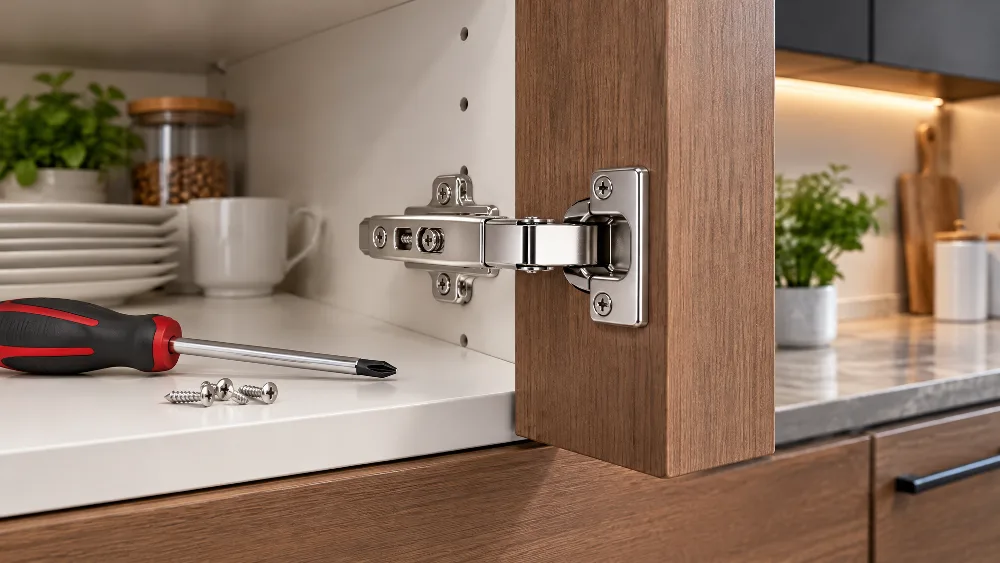
Cycle testing gives another useful benchmark for comparing hardware. The supplied product specifications state that some models are tested for up to 80,000+ closing cycles; confirm the exact model and test conditions with the manufacturer. Applicable soft-close models are designed to provide controlled closing, with the damping behavior and adjustment range depending on the specific hinge. According to the product data, some models also include a buffer on-off function for adjusting closing speed.
Frequently Asked Questions
Can I change cabinet hinges without taking the doors off the cabinet?
Attempting to replace hinges with the doors still attached frequently leads to stripped screw holes and damaged cabinet stiles. Without external support, the door acts as a long lever, applying severe shear force on the single remaining hinge. Removing the door entirely allows you to work horizontally, ensuring precise cup placement and avoiding accidents.
What should I do if the new hinge cup holes do not match my old hinges?
If your original doors feature smaller bore holes or surface-mounted butterfly hinges, you must bore fresh pockets according to the new hinge specifications. Fill old screw holes with glued hardwood plugs and allow them to cure. Mark your new setback distance precisely according to the manufacturer’s drilling template, and drill new pockets using the appropriate Forstner bit fitted with a depth stop.
Why does my soft-close cabinet door bounce back instead of closing completely?
Bounce-back can result from incorrect overlay, binding between the door and frame, incompatible hinges, or a door that is too light for the damper. Check for binding and verify hinge compatibility first. If the model provides a buffer adjustment or on-off switch, use it only as described in the manufacturer’s instructions; adjust or deactivate dampers symmetrically where the instructions require it.
How can I determine whether my cabinets are face-frame or frameless?
Open a cabinet door and inspect the front perimeter edges of the wooden cabinet box. If you see an applied hardwood frame framing the opening like a picture frame, you have face-frame cabinets. If the box consists of simple plywood or particleboard panels with edge banding and no front perimeter frame, your kitchen features European-style frameless construction.
Maintaining Perfect Cabinet Alignment for the Long Run
Understanding how to change hinges on kitchen cabinets changes the daily feel of your kitchen. Replacing loose, noisy hinges with compatible soft-close models can restore even reveals and reduce impact on the surrounding wood. By following systematic assessment methods, careful pilot hole preparation, and three-dimensional screw adjustments, you can achieve professional cabinetry alignment without hiring a contractor.
Choosing hardware with documented finish specifications and manufacturer-reported cycle-test ratings gives you a sound basis for comparing replacement hinges. Once you know how to change hinges on kitchen cabinets, take your time during initial alignment, tighten fasteners with balanced torque, and recheck the reveals after the doors have been in use for a few weeks.
CONTACT US


GuangDong JinLi XiangXing Precision Metal Manufacturing Co., Ltd.
We are always providing our customers with reliable products and considerate services.
If you would like to keep touch with us directly, please go to contact us
-

Home
-

Tel
-

Email
-

Contact