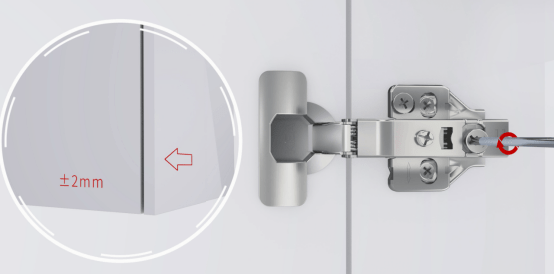
Knowing how to install furniture cabinet door hinge is the key when you install or replace a cabinet door. Since doors are not cheap in the market, it's important to install door hinges correctly, otherwise it will greatly increase your furniture cost. Generally, furniture cabinet door hinge installation can come into surface-mounted and recessed. In this blog, we will take clip on concealed cabinet door hinges with 3D adjustment as an example and show you step by step instructions on how to install recessed hinges on your cabinet.
Tools Required for Installation
Here's a list of what you'll need to install furniture door hinges. As with every job, Preparing the proper tools make your work more efficient.
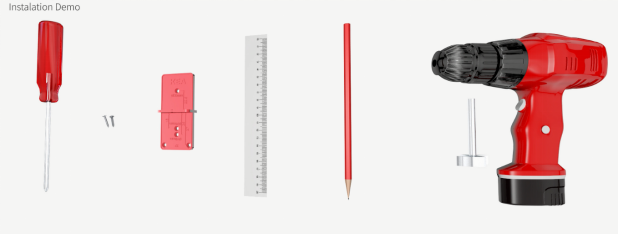
- Concealed cabinet door hinges
- Screws
- Ruler
- Pencil
- Positioner
- Screwdriver
- Electric drill
- Forstner bit
Determine the Amount of Door Hinge Required
In order to ensure the normal operation of the door, a sufficient number of cabinet door hinge should be installed. The quantity of cabinet door hinge is based on the height and weight of the door. Shown as below diagram.
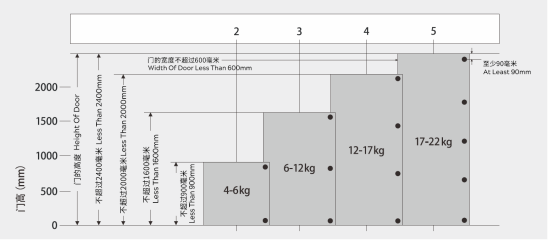
The data in the chart is based on the standard door width in 600mm. To keep good stability, please try to widen the distance of each hinge when installing.
Installing furniture door hinges in 7 steps
With the right tools in hand, follow the steps below to install modern hinges for kitchen cabinet. Here, we take 35mm concealed cabinet door hinge with 3D adjustment as an example.
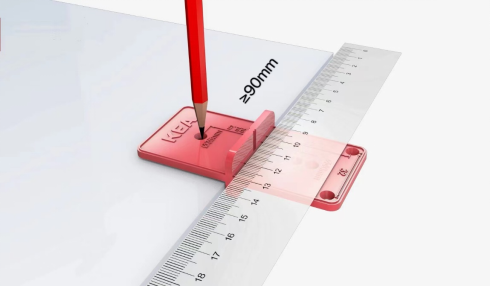
1. Mark the Door
Use a pencil, ruler and positioner to mark the areas of the door where you need to install the hinges. Generally, the distance between the top or bottom sides of the door and the hinge is greater than or equal to 90mm, distance from door edge to cup hole edge is 5mm.
2. Drill the Hinge Cup Holes
After determining the position of concealed cabinet hinge on the door, use a 35-millimeter forstner bit to drill the flat-bottomed hole for the cup. Position it on the center point, and bore into the door until the desired depth is reached. It is based on how deep the hinge needs to be recessed.
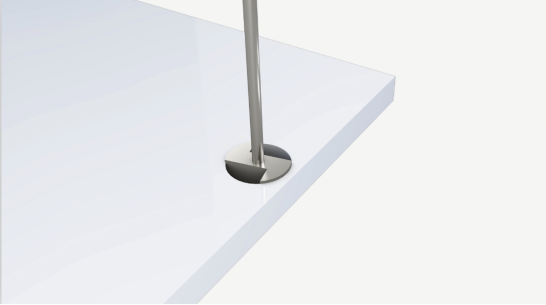
3. Install the Hinge Cups
Press the hinge cups into pre-opened cup holes, as shown, to keep the hinge aligned. Then put wood screws into the screw locations and tighten to anchor each cup.
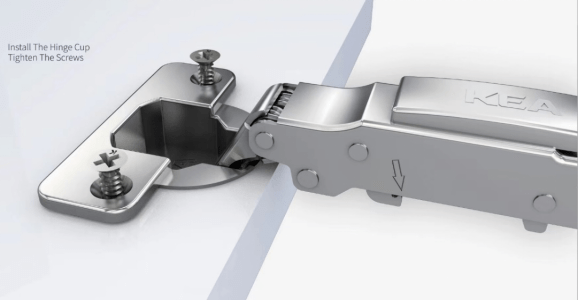
4. Mark the Cabinet to Drill Screw Holes
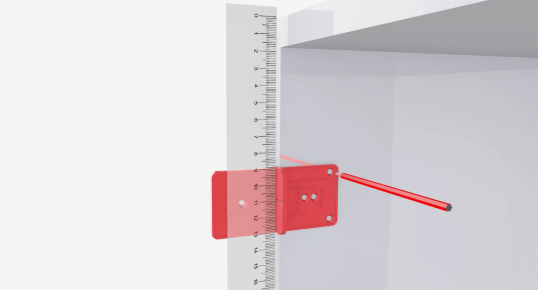
Use a pencil, ruler and positioner to mark screw locations on the cabinet's side panel. Shown as below, draw installation auxiliary line with positioner and it is 37mm away from the edge of the cabinet.
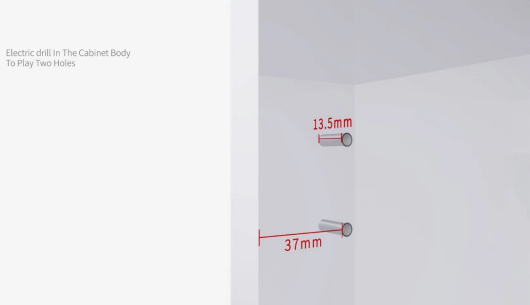
5. Install the Mounting Plate
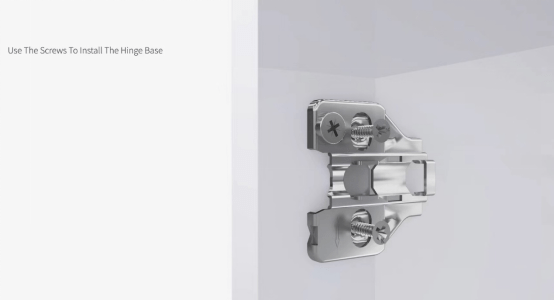
Remove the mounting plate from the door hinge. Align its screw holes with the intersecting layout lines on the side panel of cabinet. Then attach the plate with wood screws, as shown.
6. Mount the Door
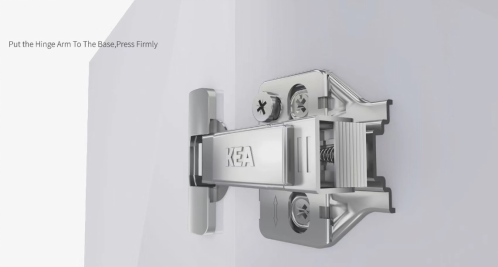
After setting the mounting plate into the side panel of cabinet, hold the door in the open position and set the hinge arms into their mounting plates. Then close the cabinet door and check if the gap between door panel and cabinet is neat after installation.
7. Adjust the Distance between the Door and the Cabinet
If the gap between the door panel and the cabinet is irregular after installation, we can adjust it via the screws of hinge.
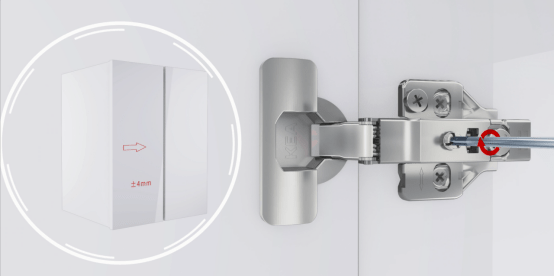
(1) Adjust Side to Side
Problem: Uneven or insufficient gap between adjacent doors, or the door doesn't align with the cabinet.
Solution: Turn front screw clockwise to make the door closer to the cabinet side, counterclockwise to pull the door away from the cabinet side.
(2) Adjust Up and Down
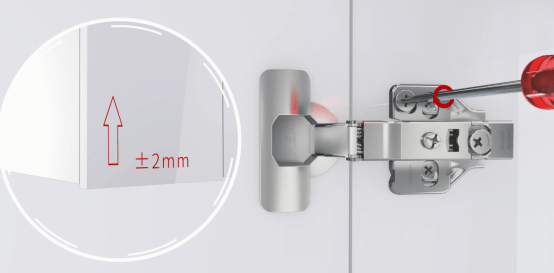
Problem: Top and bottom of door don't align horizontally with adjacent door or cabinet edge.
Solution: Turn the screw of the mounting plate clockwise to shift door up, counterclockwise to shift it down.
(3) Adjust In and Out
Problem: Door swings open, or doesn’t close flush against cabinet.
Solution: Turn rear screw clockwise to pull the door toward the cabinet side, counterclockwise to push the door away from the cabinet side.
