
Self-Closing Cabinet Hinges: How to Install and Adjust Them Easily
- By:
- Date:2025/10/31
Self-closing cabinet hinges will automatically tighten the cabinet door when it is about to close, which is both convenient and modern in appearance. Whether you are replacing old hinges or installing new ones, learning how to install and adjust self-closing cabinet hinges is much easier than you might think.
What Are Self-Closing Cabinet Hinges?
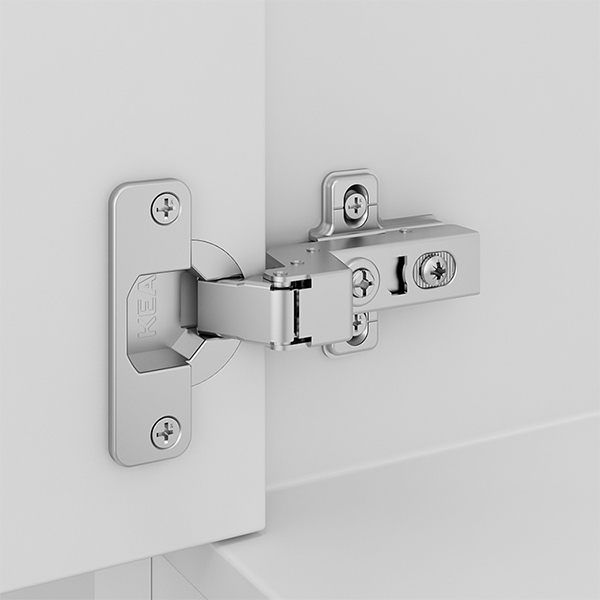
Self-closing cabinet hinges are equipped with a built-in spring mechanism. When the cabinet door approaches the closed position, this mechanism will automatically pull the cabinet door tight. This convenient design helps prevent the cabinet door from being left open for a long time and minimizes the wear and tear on the hinges and frame.
There are several common self-closing hinges available on the market for selection, such as overlay hinges, inset hinges, partial overlay hinges, etc. The working principles of each type of hinge are slightly different. Therefore, before installation, it is essential to choose a hinge style that matches the design and expected appearance of the cabinet.
Tools and Materials You’ll Need
Before starting to install the self-closing cabinet hinges, please ensure that all necessary tools and materials are fully prepared. This includes self-closing hinges (make sure they match the type of cabinet), screwdriver or drill, measuring tape or ruler, pencil or marker, level or combination square, etc.
If you are installing multiple doors, using optional tools such as a hinge jig or template can make the installation process faster and more precise. With the right tools and thorough preparation, the entire installation process will become much easier and more efficient.
Step-by-Step Installation Guide
Remove the Old Hinge: Before installing the self-closing hinge, the first step is to remove the old hinge. Use a screwdriver to loosen the screws on both the door and the cabinet side. If you plan to reuse old screws, you can store them properly.
Mark Hinge Placement: Install the new self-closing hinge at the original hinge position on the cabinet door, or measure and mark the new position. Typically, hinges are installed about 2 to 3 inches from the top and bottom edges of the door. Mark the position of the screw with a pencil or marker.
Attach Hinges to the Door: Align the hinge plate with the marking and secure it with screws. If your hinges are equipped with adjustable mounting plates, please install them as well, but do not fully tighten the screws – you’ll need some flexibility for fine-tuning later.
Mount the Door to the Cabinet Frame: Hold the door in place (it’s best if someone helps), and connect the hinge arm to the mounting plate on the cabinet frame. After alignment, tighten the screws.
Check Alignment and Closure: Gently close the door to see if it fits properly. The self-closing function should automatically close the door at the last 1 to 2 inches. If the door looks uneven or doesn’t close smoothly, you need to make some adjustments.
How to Adjust Self-Closing Cabinet Hinges
Most modern self-closing cabinet door hinges come with built-in adjusting screws that allow you to fine-tune the position of the cabinet door in three directions (left and right, height, and depth) for a perfect fit.
To make these adjustments, please use a Phillips screwdriver to slowly turn the screws and test the movement of the cabinet door after each fine-tuning. Continue to make minor adjustments as needed until the cabinet door closes smoothly and steadily. Once you are satisfied with the alignment, please tighten all the screws.
Conclusion
Installing self-closing cabinet hinges is not difficult. With just a few tools and a little patience, you can enjoy the satisfying click sound of perfectly aligned cabinet doors every time they close automatically. KEA offers a wide range of high-quality self-closing hinges designed for smooth performance and long-lasting durability.
CONTACT US

GuangDong JinLi XiangXing Precision Metal Manufacturing Co., Ltd.
We are always providing our customers with reliable products and considerate services.
If you would like to keep touch with us directly, please go to contact us
-

Home
-

Tel
-

Email
-

Contact