
How to Replace Cabinet Hinges Without Damaging Your Cabinets
- By:
- Date:2025/10/27
Replacing cabinet hinges may seem like a trivial matter, but it can significantly enhance the appearance and functionality of the cabinet. Over time, the hinges may become loose, rusty, or misaligned, causing the cabinet doors to creak or hang unsteadily. The key to smoothly replacing hinges lies in not damaging the cabinet frame or cabinet door. With the correct methods and tools, you can easily replace the hinges while keeping the cabinet in good condition.
Choose the Right Hinges
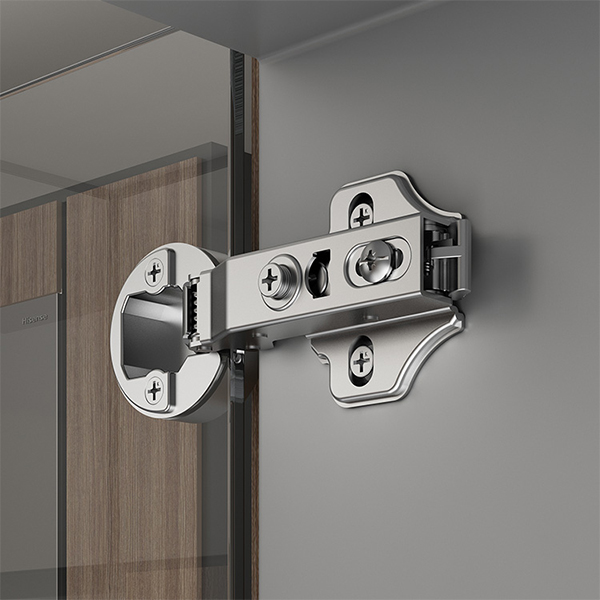
Before starting the replacement, please ensure that the type of hinge you are replacing is correct. There are various styles of cabinet hinges – covering type, recessed type, concealed type, surface mount type, etc.
Note down the types of hinges you currently have. If you are not sure, you can take an old hinge to a hardware store to look for a perfectly matching one. Using the wrong type of hinge can lead to improper alignment of door panels or the need for unnecessary drilling, thereby damaging the cabinet.
Prepare Appropriate Tools
Before starting to replace the cabinet door hinges, preparing the appropriate tools can make the entire process smoother and more efficient. Please first confirm that you have prepared all the necessary tools, including a new hinge, a screwdriver or drill, a level, a tape measure or ruler, and a pencil for marking holes.
These tools can help you accurately position, install stably, and ensure that the final effect is neat and beautiful. If you are well-prepared, you can easily complete the following installation steps.
Disassemble the Cabinet Door
First, remove the cabinet door. Use a screwdriver or an electric drill to carefully unscrew the screws that fix the hinges. After removing the door panel, gently place it on a soft towel or blanket prepared in advance. This can not only protect the surface paint layer but also prevent the corners of the door panel from being knocked or scratched.
Before removing the old hinges, please gently outline them with a pencil. These marks will serve as a reference when installing new hinges, helping you avoid misalignment.
Remove the Old Hinges Carefully
Use a screwdriver to slowly unscrew the screws that fix the old hinge. Apply force evenly to prevent the screw head from falling off. The entire process should be as smooth as possible to ensure that the door panels or the surface of the cabinet are not scratched.
After removing the old hinge, check if there is any damage in the installation area. Check if there is any peeling, wood chip fragmentation or uneven surface in the screw holes. If necessary, the damaged screw holes or surfaces should be repaired first before installing new hinges.
Install the New Hinges
Position the new hinge with a pencil mark as a guide. Gently screw in the screws at the top and bottom, but do not tighten them completely. This way, the alignment of the hinges can be adjusted before all components are fixed.
If your new hinges contain adjusting screws, please use them to fine-tune the height, depth, and left-right alignment of the door. This can ensure that the door closes smoothly and is flush with the adjacent door.
Test and Finish Up
After installing all the hinges, please test each door. Turn them on and off several times to ensure they move smoothly and are aligned correctly. Make final adjustments as needed.
Conclusion
By following the above steps, you can rest assured to replacing the cabinet hinges without causing any damage to the cabinets. As long as you patiently use the appropriate tools and methods, you will have cabinet doors that open smoothly, have a beautiful appearance, and are durable.
CONTACT US

GuangDong JinLi XiangXing Precision Metal Manufacturing Co., Ltd.
We are always providing our customers with reliable products and considerate services.
If you would like to keep touch with us directly, please go to contact us
-

Home
-

Tel
-

Email
-

Contact