
How to Install Cabinet Hinges: Beginner’s DIY Guide with Tools & Tips
- By:
- Date:2025/10/27
Installing cabinet hinges may sound difficult, but with patience, the right tools, and some practical tips, you can achieve professional results.
Whether you are replacing old hinges or installing new ones for newly installed cabinets, understanding the basic knowledge of alignment, positioning and adjustment can ensure that your cabinet doors open and close smoothly. This guide will guide you step by step through the installation process, covering everything from preparation to final adjustment.
1. Prepare Your Tools and Materials
Before you start, please make sure you have all the necessary tools ready. Commonly used tools include tape measures, pencils, screwdrivers or drills, and levels.
In addition, it is necessary to prepare hinges and screws that match the cabinet door. Making all preparations in advance can avoid interference and help maintain accuracy throughout the installation process.
2. Mark and Drill the Hinge Holes
The next step is to determine the installation position of the hinge. Usually, one hinge is about 2 to 3 inches away from the top of the door, and the other hinge is at the same distance from the bottom of the door. If your cabinet door is relatively high, you may need to install a third hinge in the middle to provide additional support. Use a tape measure and a pencil to accurately mark the positions on the doors, ensuring that the installation heights of each door are consistent.
Before drilling, be sure to carefully check the marks and make sure there are no errors before starting. It is recommended to first test drill on a piece of scrap wood to ensure that the depth, diameter, and position of the hole are all appropriate.
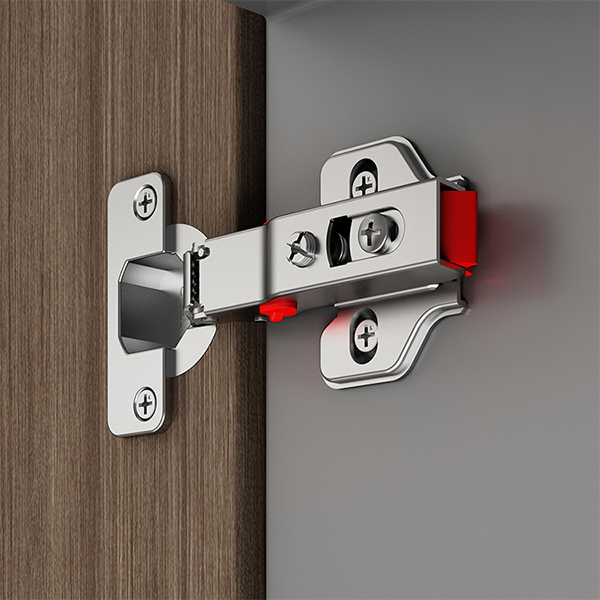
3. Attach the Hinges to the Door
After the hole is prepared, place the hinge cup into the hole and align it with the mark. Use the provided screws to fix the hinge cup. Tighten the screws, but do not tighten them too much to avoid scratching the wood. Repeat this process for all the hinges on each door.
If you are using exposed hinges, you can skip the cup hole drilling step - just install the hinges directly on the surface and fix them with screws.
4. Mount the Door to the Cabinet Frame
After the hinges are fixed on the door, the door can be installed on the cabinet. It's best to have another person hold the door while you mark and pre-drill holes on the cabinet frame. Align the door carefully so that it is flush with the edges of adjacent doors or cabinets. After alignment, use a screwdriver or drill to fix the hinges to the cabinet.
When tightening screws, pay attention to the force applied to avoid deformation due to excessive tightness. After installation, open and close the door several times to check if it moves smoothly.
5. Adjust and Align the Hinges
Even a slight misalignment can make the cabinet door appear asymmetrical or crooked, so it is essential to make fine adjustments after installation. Most modern hinges are equipped with adjustment screws that can be fine-tuned.
These screws can be used to adjust the up and down, left and right, and front and back positions of the cabinet door. Start from a small angle and check if they are aligned after each adjustment. After adjusting until you are satisfied, check and tighten all the screws to complete the final fixation.
6. Final Checks
After all the cabinet doors are installed and aligned, conduct the final inspection. Open and close each cabinet door several times to ensure smooth opening and closing.
After confirming that all positions are correct, use a screwdriver to check all screws one by one and tighten those that are slightly loose to prevent sagging or shaking after long-term use.
Conclusion
Installing cabinet hinges is not difficult. With just a few basic tools and careful attention to details, you can change the appearance and function of your cabinet. Once you master this process, future repairs or upgrades will become a piece of cake.
CONTACT US


GuangDong JinLi XiangXing Precision Metal Manufacturing Co., Ltd.
We are always providing our customers with reliable products and considerate services.
If you would like to keep touch with us directly, please go to contact us
-
![Home]()
Home
-
![Tel]()
Tel
-
![Email]()
Email
-
![Contact]()
Contact


